Note: This guide makes necessary changes in the Debut theme, but the same principle of editing the header.liquid can be applied to other themes.
An SVG file is preferable to any raster image format (e.g. PNG or JPEG) for your website logo. As a vector image format, SVG stores your logo as a series of paths, shapes, and fills, making them infinitely scaleable without any loss in image quality.
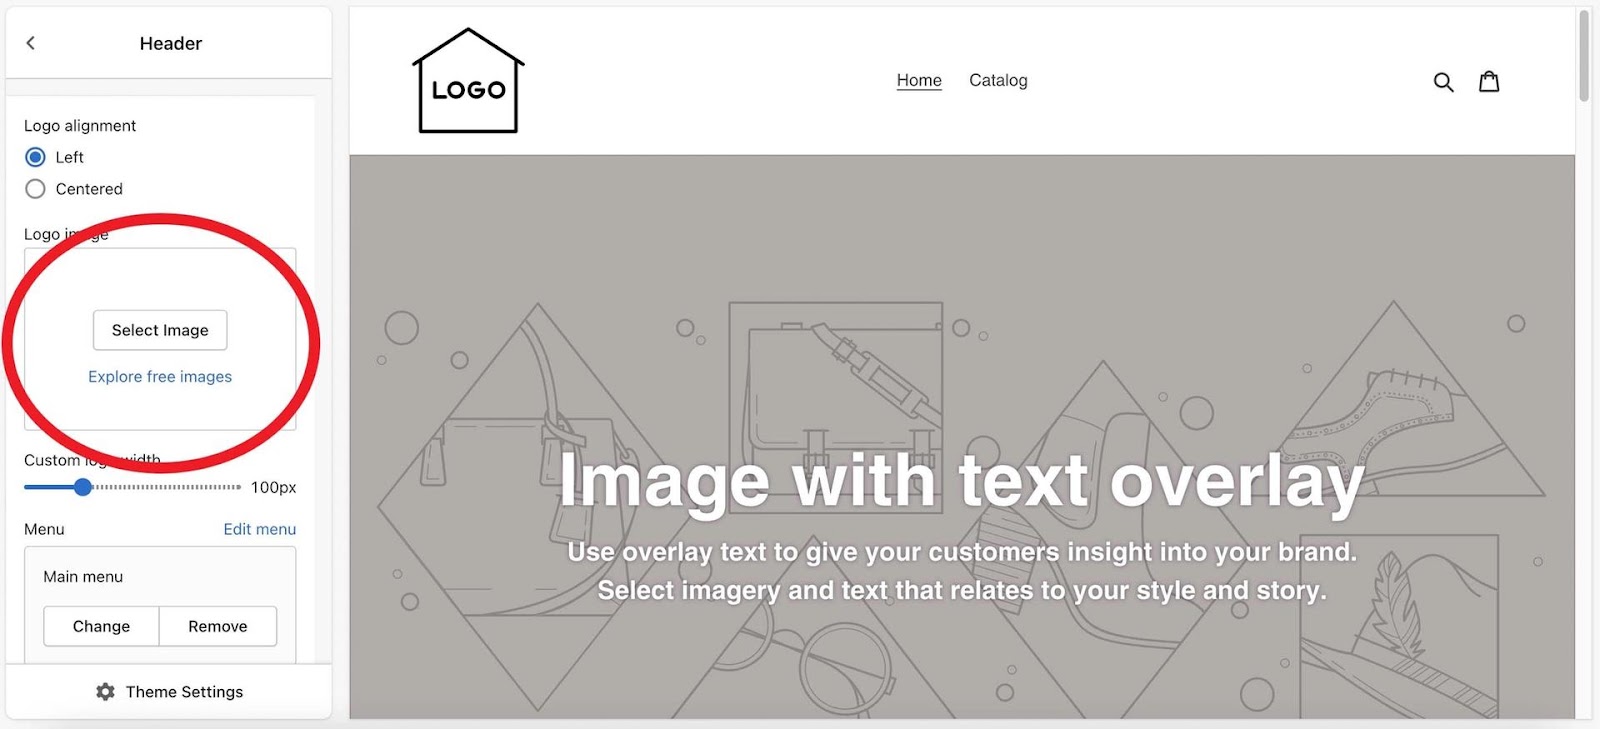
Out of the box, Shopify lets you upload a custom logo in the theme customizer. However, only .png, .jpeg/.jpg and .gif files are supported.
They do at least optimize your uploads by creating responsive size variations, but there is no question that an SVG file is the way to go if you already have a vector version of your logo.
In this guide, I’ll walk you through the basic steps to use an SVG file as your Shopify store logo.
You’ll need some technical proficiency, as it does involve going into the theme editor and editing some code–but it’s not that difficult. (Luckily, Shopify has version control for all its files so you can roll back any changes you make if you run into trouble!)
Step 1: Launch the Shopify Code Editor
Firstly, you’ll need to access the Online Store -> Themes area in the Shopify admin.
From there, click “Customize” under your current theme.
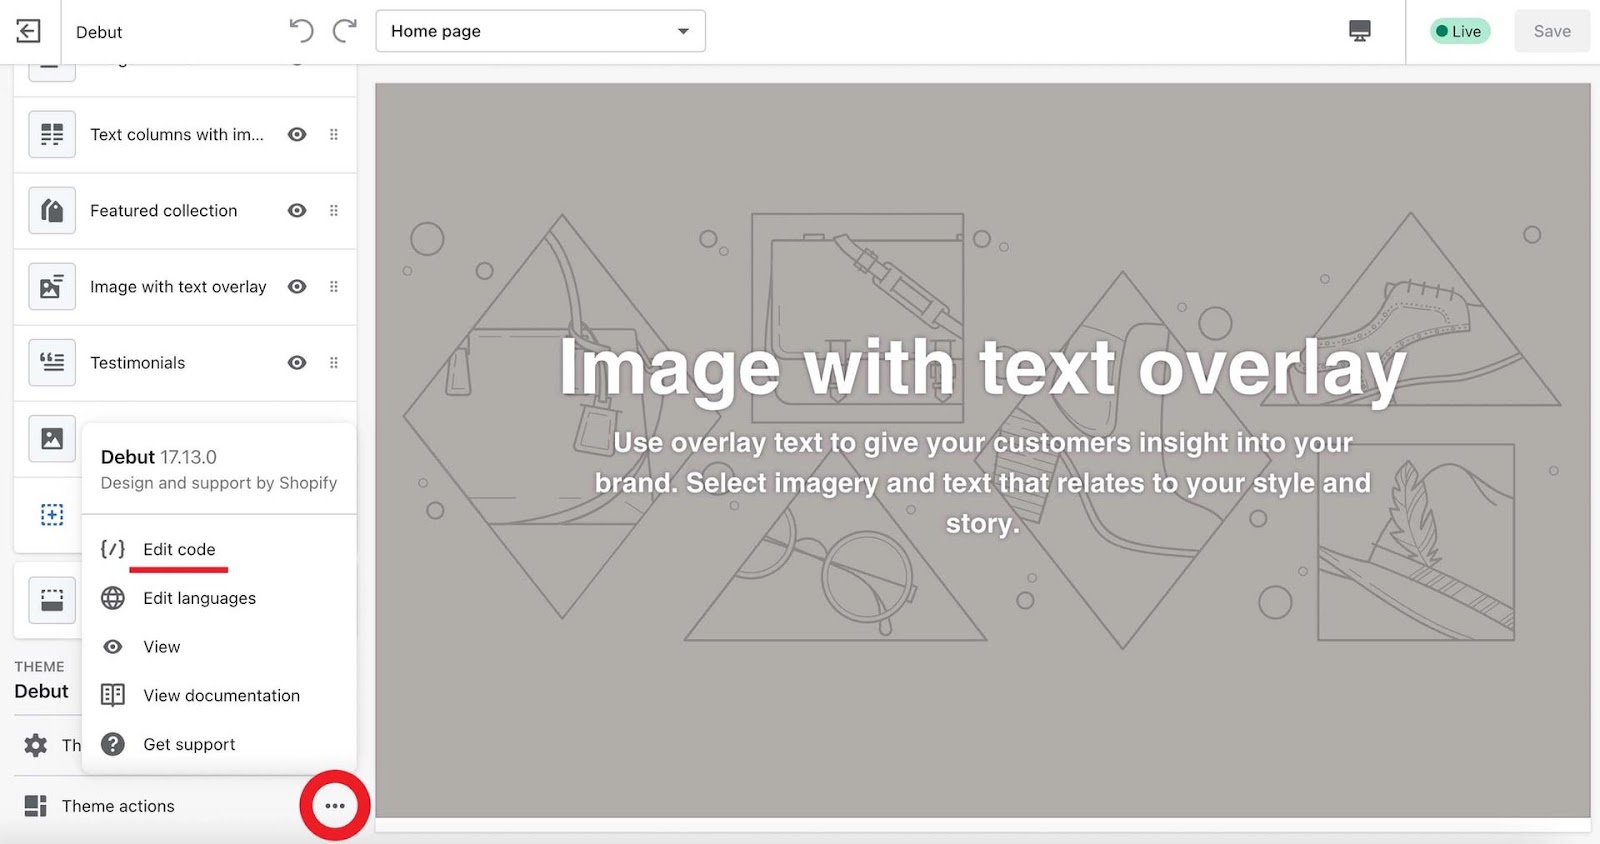
Then click Theme Actions -> Edit Code.
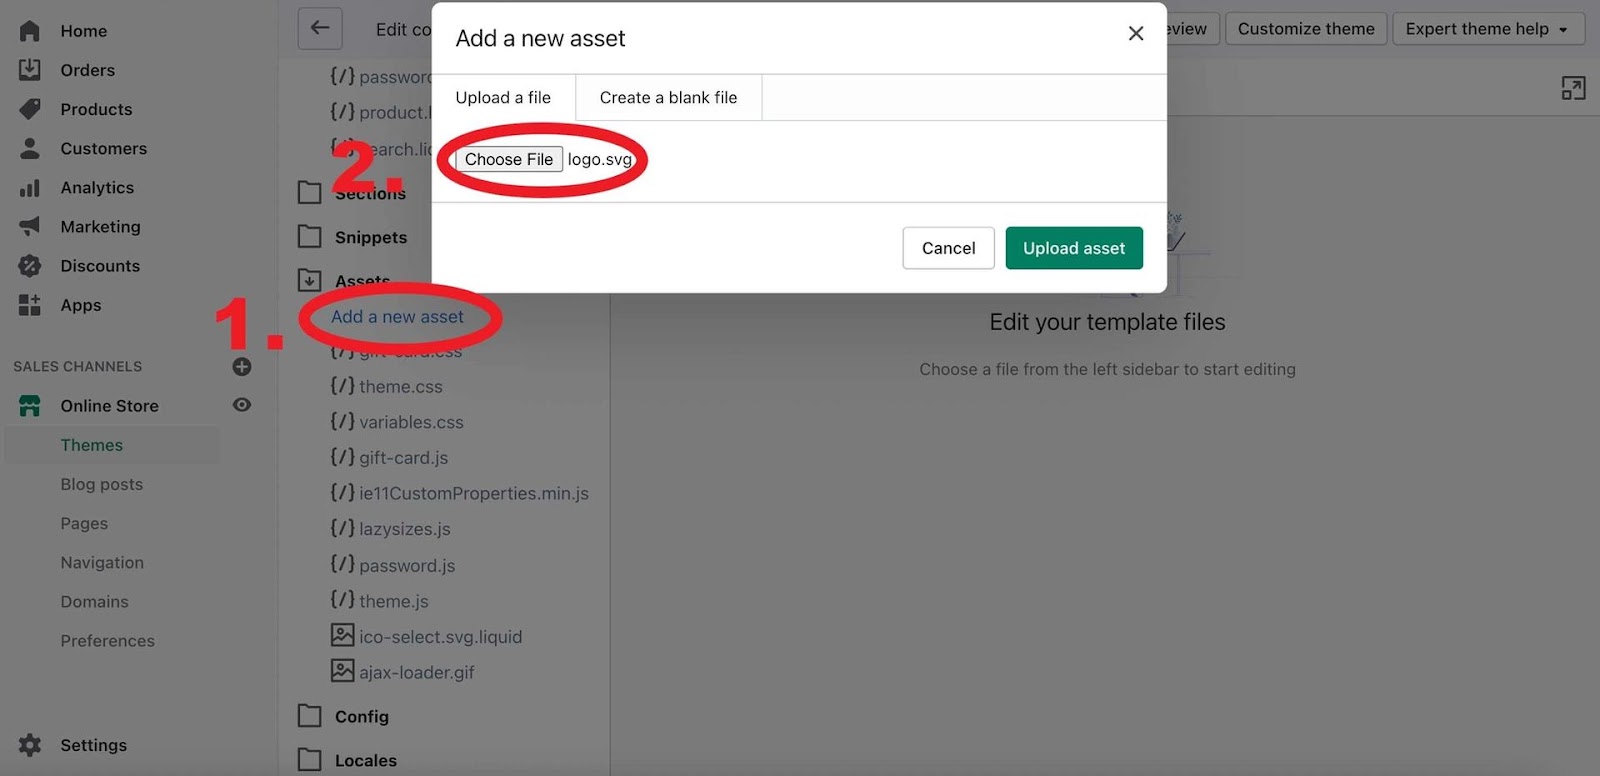
Step 2: Upload Your SVG Logo File to Assets
From the code editor, Add a new asset and then upload your SVG file. In this guide, my SVG logo file is “logo.svg”.
Step 3: Edit the “header.liquid” File
Now for the actual code edit that will make the SVG logo you just uploaded be used as the image that appears in your shop’s header.
Fine the header.liquid file located under Sections. Next, find the area in the code which defines how the logo is loaded. You can do a search for {% if section.settings.logo %} which is where this section starts.
Right now, it should look something like this:
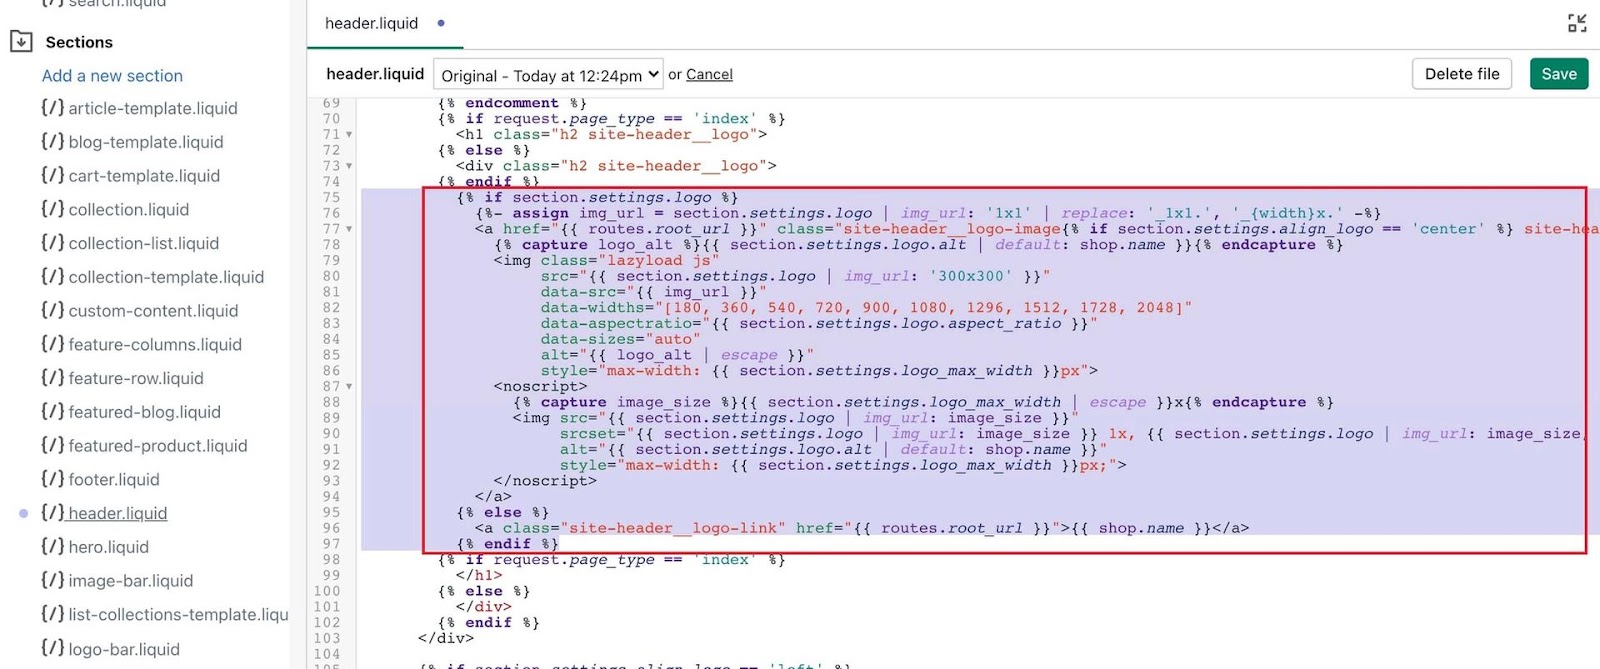
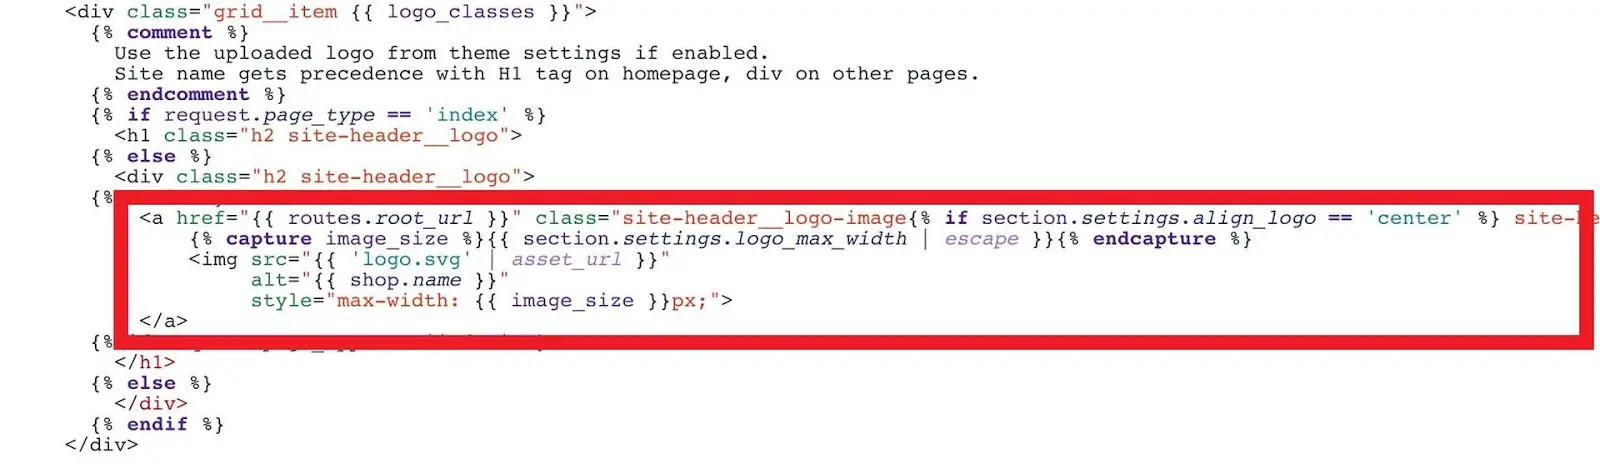
Replace the part I’ve highlighted (starting with {% if section.settings.logo %} and ending with its corresponding {% endif %} tag) with the following:
<a href=”{{ routes.root_url }}” class=”site-header__logo-image{% if section.settings.align_logo == ‘center’ %} site-header__logo-image–centered{% endif %}”>
{% capture image_size %}{{ section.settings.logo_max_width | escape }}{% endcapture %}
<img src=”{{ ‘logo.svg’ | asset_url }}”
alt=”{{ shop.name }}”
style=”max-width: {{ image_size }}px;”>
</a>
The code area in the header.liquid should now look like this:
Hit save and voila! You now have an SVG logo for your Shopify store.
Essentially, this code snippet means the image that is used as the logo is the “logo.svg” file we uploaded earlier. The max width respects whatever value you have set in the theme customizer.
Step 4: Make sure everything looks good
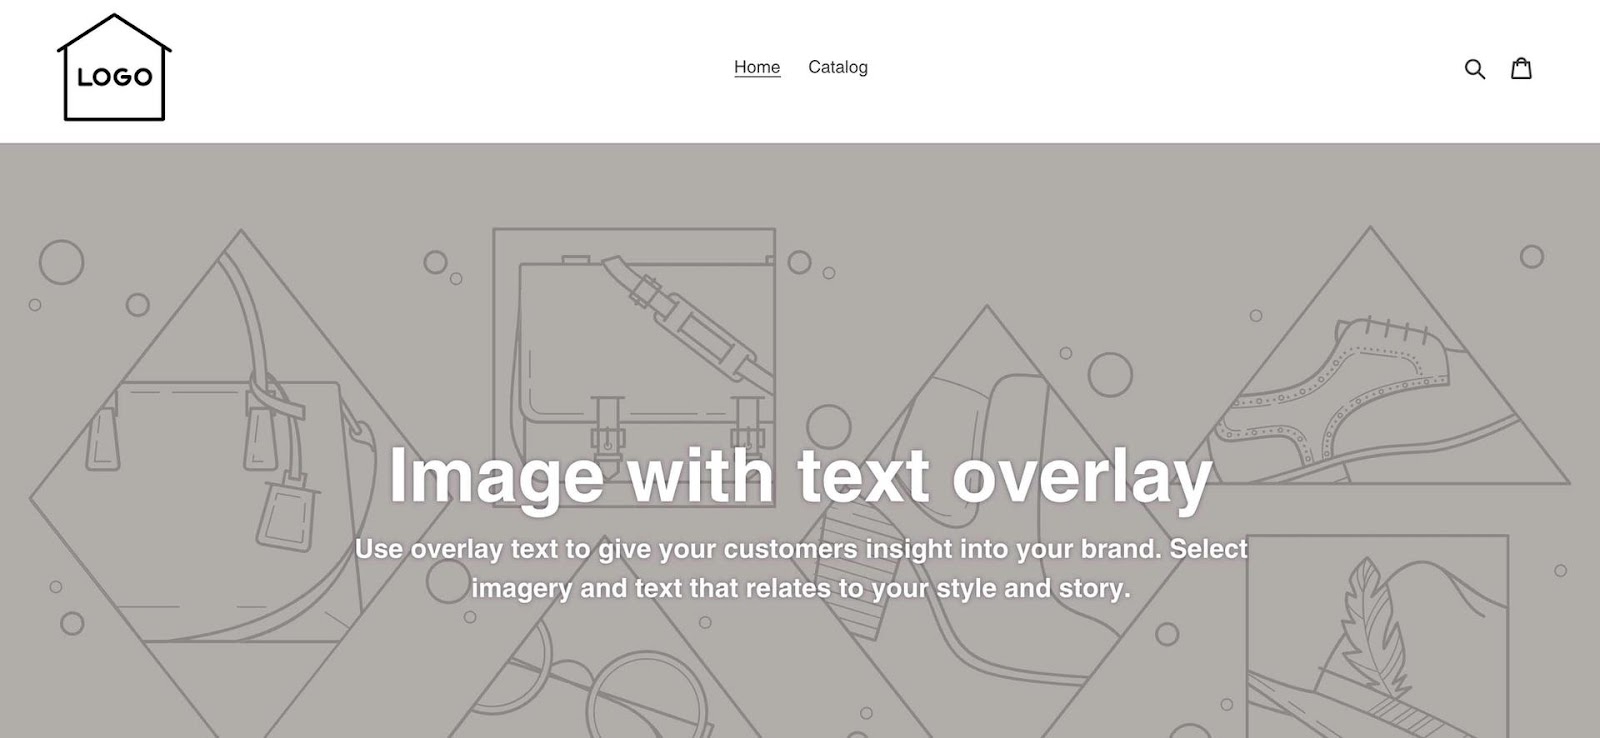
At this point you should revisit your store to make sure the logo is correctly displayed in the header. It should appear correctly across different screen sizes.
Things to Note
The resulting code is much smaller
First of all, you might wonder why the SVG code that replaces the original code is so much shorter in length.
The main reason is that because we are dealing with an SVG image, we don’t need to bother defining a srcset. That matters with PNG or JPEG files, where users often add highly detailed or large images that would otherwise load slowly and waste bandwidth.
Secondly, the SVG logo is not “lazy loaded”, further reducing the snippet length. I agree that lazy loading is a must for most images on a modern website, but not for an above-the-fold SVG logo that is small by nature. Most websites using SVG logos do not lazy load them.
You could add inline SVG instead
In the implementation shown we load an external SVG file from your assets folder, in our case named “logo.svg”.
Another popular approach is to simply add inline SVG and hardcode it into the header.liquid. Both approaches work, but if you’re not sure what I’m talking about, stick to the approach I’ve shown.
The uploaded logo in the theme customizer becomes redundant
Since we are now defining the logo at a lower level, any logo you select in the Shopify theme customizer becomes redundant. You can remove it or just leave it, but the important thing to note is that changing it won’t have any effect unless you revert to the original header.liquid.
Changing this image will no longer have any effect on the actual logo that gets displayed
Making any changes to the logo alignment and logo width settings will, however, be respected.